This configuration is used to set up the screen and information shown to users when an application requests access to their protected data via the OAuth 2.0 protocol.
Step-by-step procedure:
1. Log in to Google Cloud
2. Click on "Select project":
3. Select the previously created project (If no projects have been created, go to the following article Creating a Project on Google Cloud):
4. Click on "Navigation menu" in Google Cloud:
5. Go to "APIs & Services > OAuth consent screen":
6. On the screen that appears, click "Get Started":
7. Enter the application name "CG Phishing Button" and "a user support email" and click "Next":
8. Enable the "Internal" checkbox and click "Next":
9. Enter an email address that Google will use to communicate changes and click "Next":
10. Enable the checkbox "I accept the Google API Services User Data Policy" and click "Continue" and then "Create":
11. In the "Branding" section, enter "Application name", "User support email" and upload the Logo by clicking "Browse":
12. Scroll down after uploading the logo, enter "Developer contact information" and click "Save":
13. In the “Scopes” section, click “Add or remove scopes” and select the following APIs:
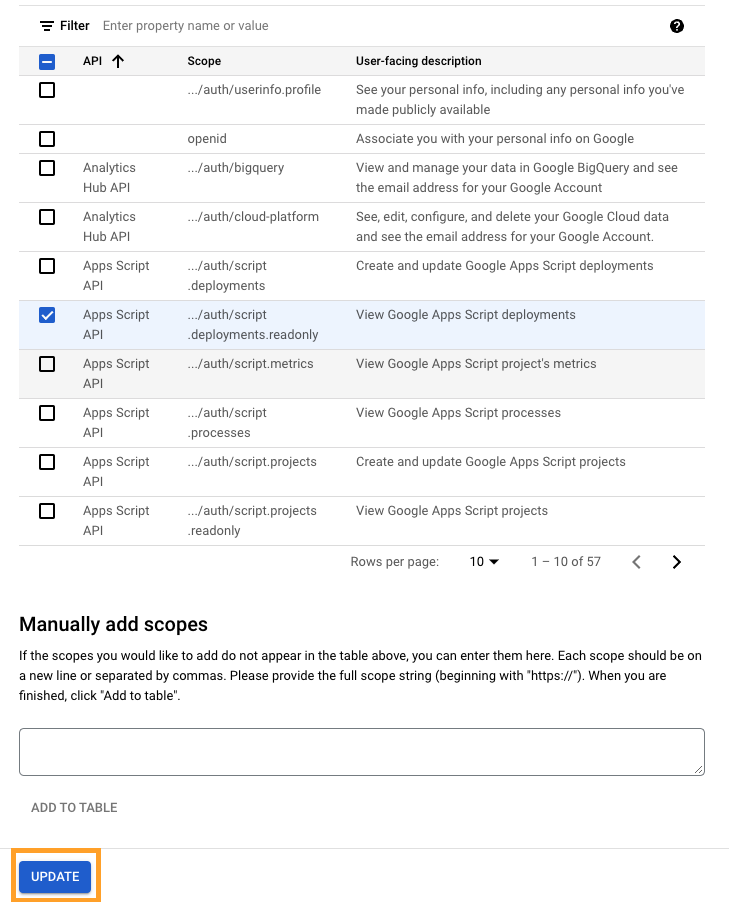
14. Select the API "View Google Apps Script deployments":
15. Scroll down the screen and click "Update":
16. Scroll down the screen and click "Save":